> ## Documentation Index
> Fetch the complete documentation index at: https://docs.gradingpal.com/llms.txt
> Use this file to discover all available pages before exploring further.
# Set Up Writing & Multi-Media Assignments
> Configure Writing & Essays, Video & Audio, Presentations, and Art & Design assignments
This guide covers setup for **Writing & Essays**, **Video & Audio**, **Presentations**, and **Art & Design** assignments.
These assignment types share a common setup flow focused on describing your assignment, creating a rubric, and configuring feedback settings.
***
## Step 1: Assignment Details
After selecting your assignment type, you'll provide the details that help the AI understand what to grade.
### Choose How to Provide Assignment Details
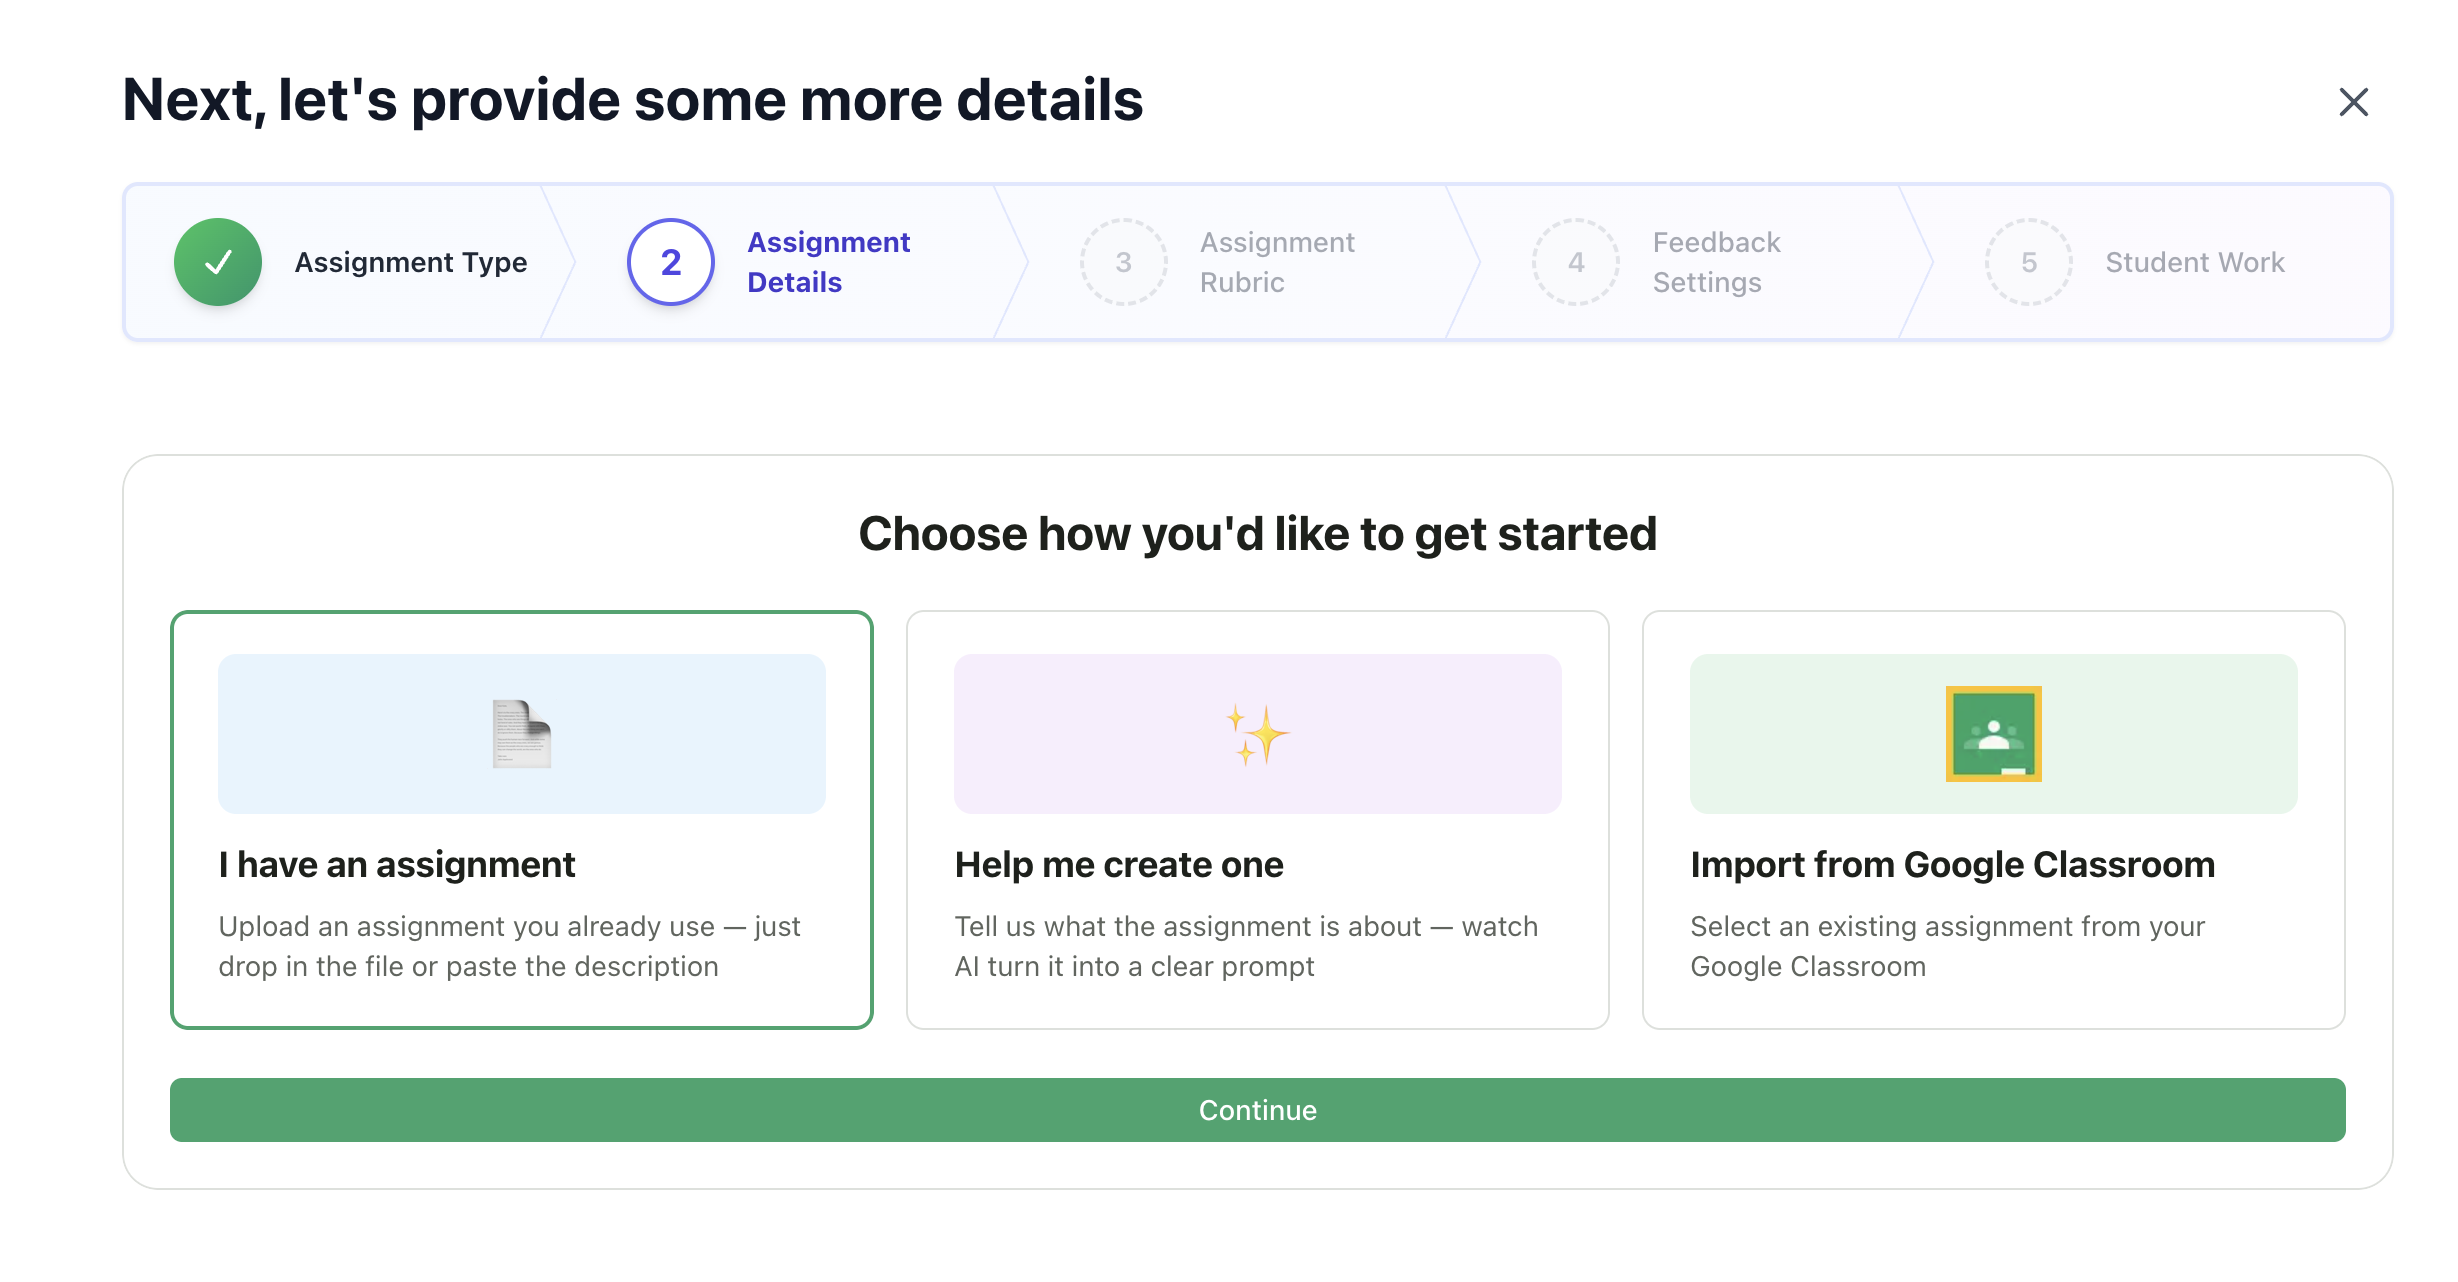 #### Option A: I Have My Assignment Ready
Use this if you already have your assignment prompt or instructions.
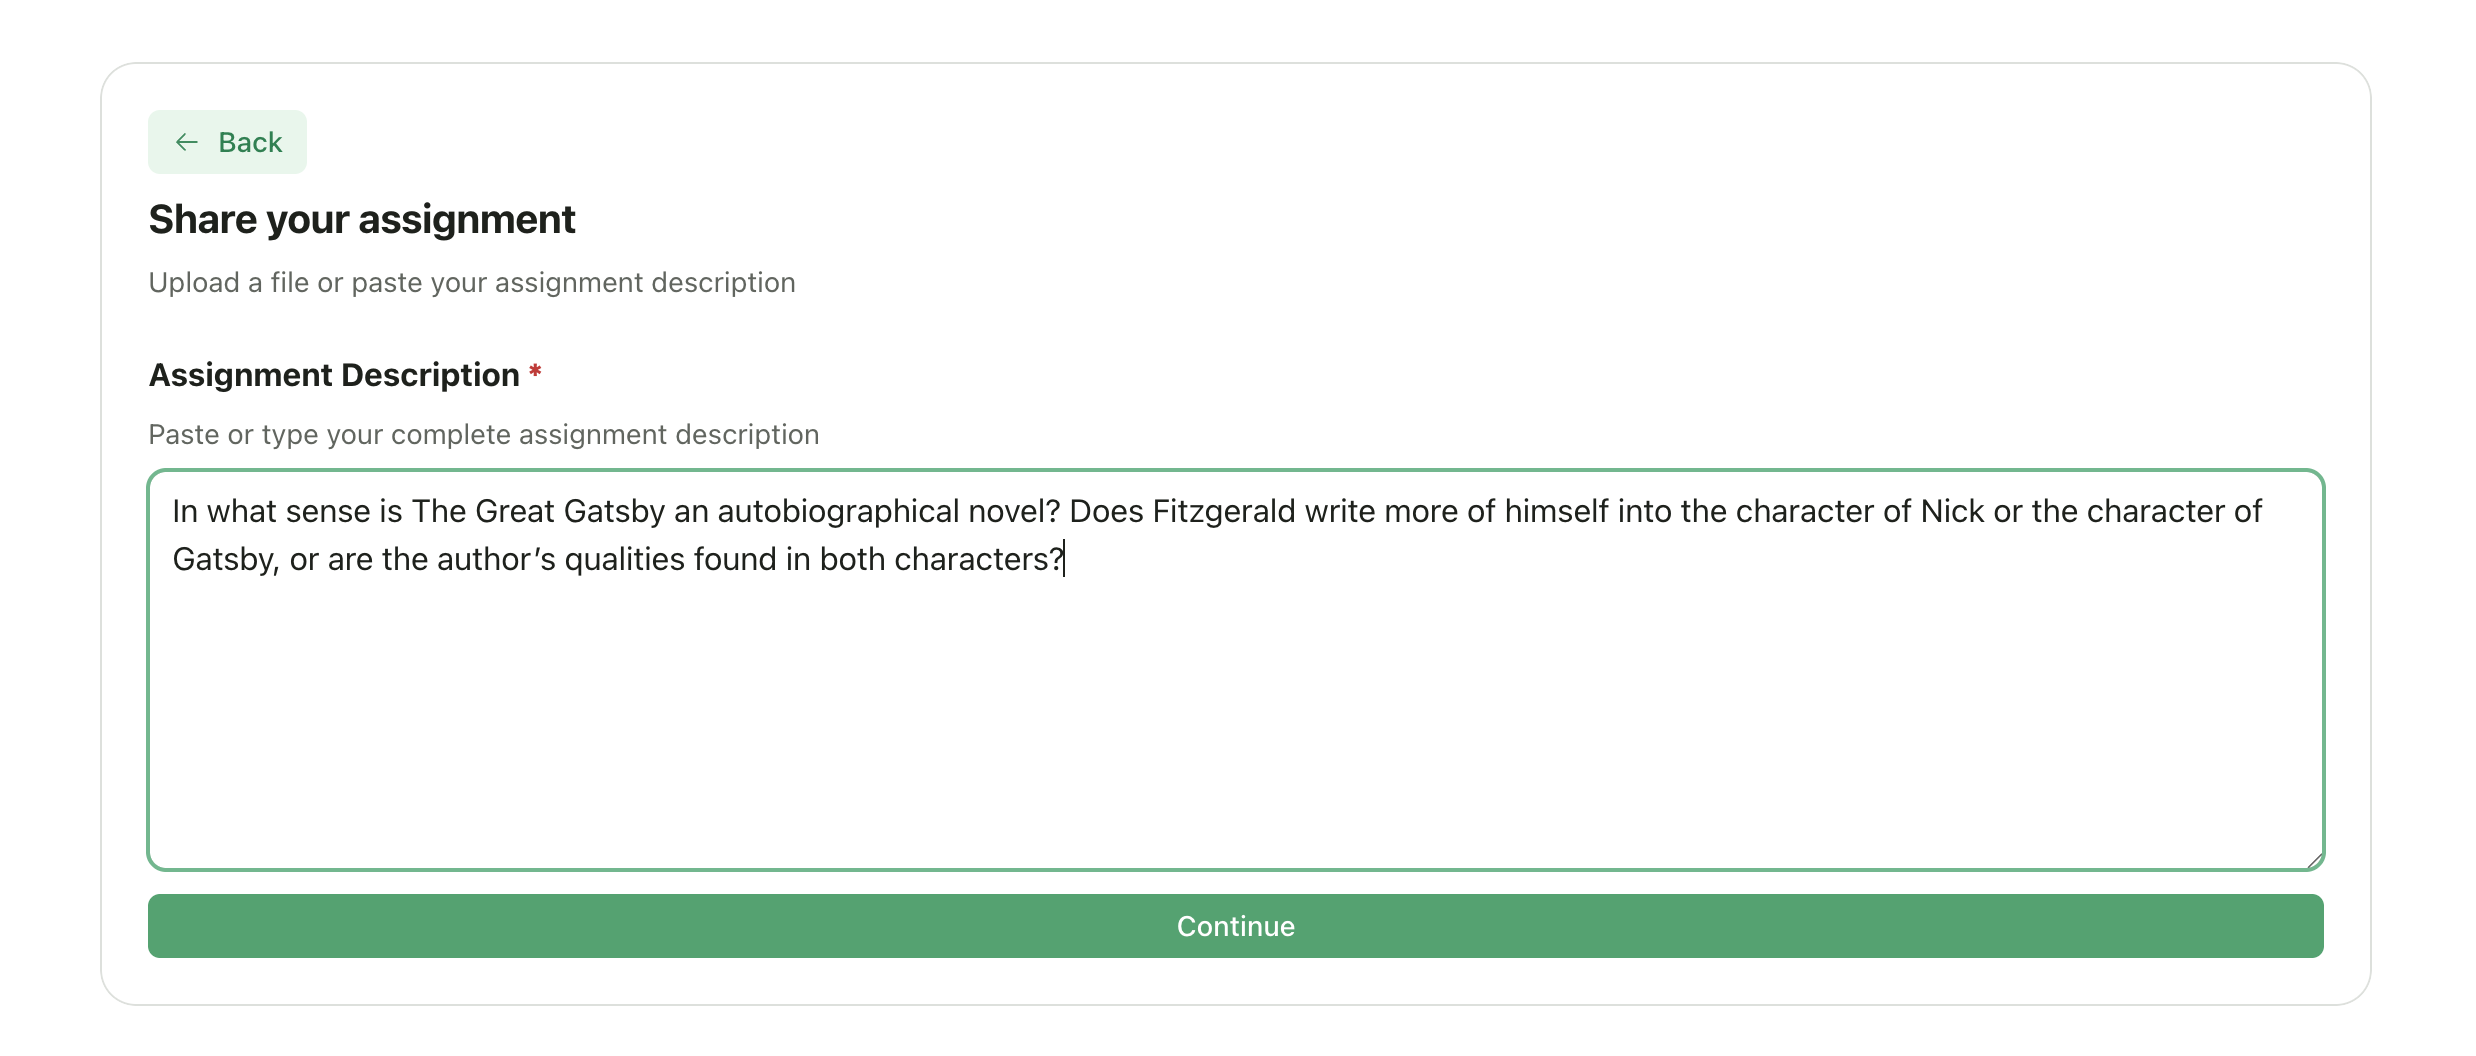
**Upload a file:**
1. Click **Upload file**
2. Select your assignment document (PDF, Word, or image)
3. GradingPal extracts the text and uses it as your assignment description
**Paste description:**
1. Click **Paste description**
2. Type or paste your assignment prompt directly
3. Include all instructions students received
#### Option A: I Have My Assignment Ready
Use this if you already have your assignment prompt or instructions.
**Upload a file:**
1. Click **Upload file**
2. Select your assignment document (PDF, Word, or image)
3. GradingPal extracts the text and uses it as your assignment description
**Paste description:**
1. Click **Paste description**
2. Type or paste your assignment prompt directly
3. Include all instructions students received
 #### Option B: Help Me Create One with AI
Use this if you need help writing your assignment prompt.
Describe what you want students to do in a few sentences
Optionally upload source materials (readings, resources, examples)
Click **Generate**
Review the AI-generated assignment description and edit as needed
#### Option B: Help Me Create One with AI
Use this if you need help writing your assignment prompt.
Describe what you want students to do in a few sentences
Optionally upload source materials (readings, resources, examples)
Click **Generate**
Review the AI-generated assignment description and edit as needed
 #### Option C: Import from Google Classroom
For Google Classroom-connected classes, you can import an existing assignment.
1. Select **Import from Google Classroom**
2. Choose an assignment from the list
3. The assignment details, description, and any attached rubric are imported
Learn more about importing from Google Classroom
***
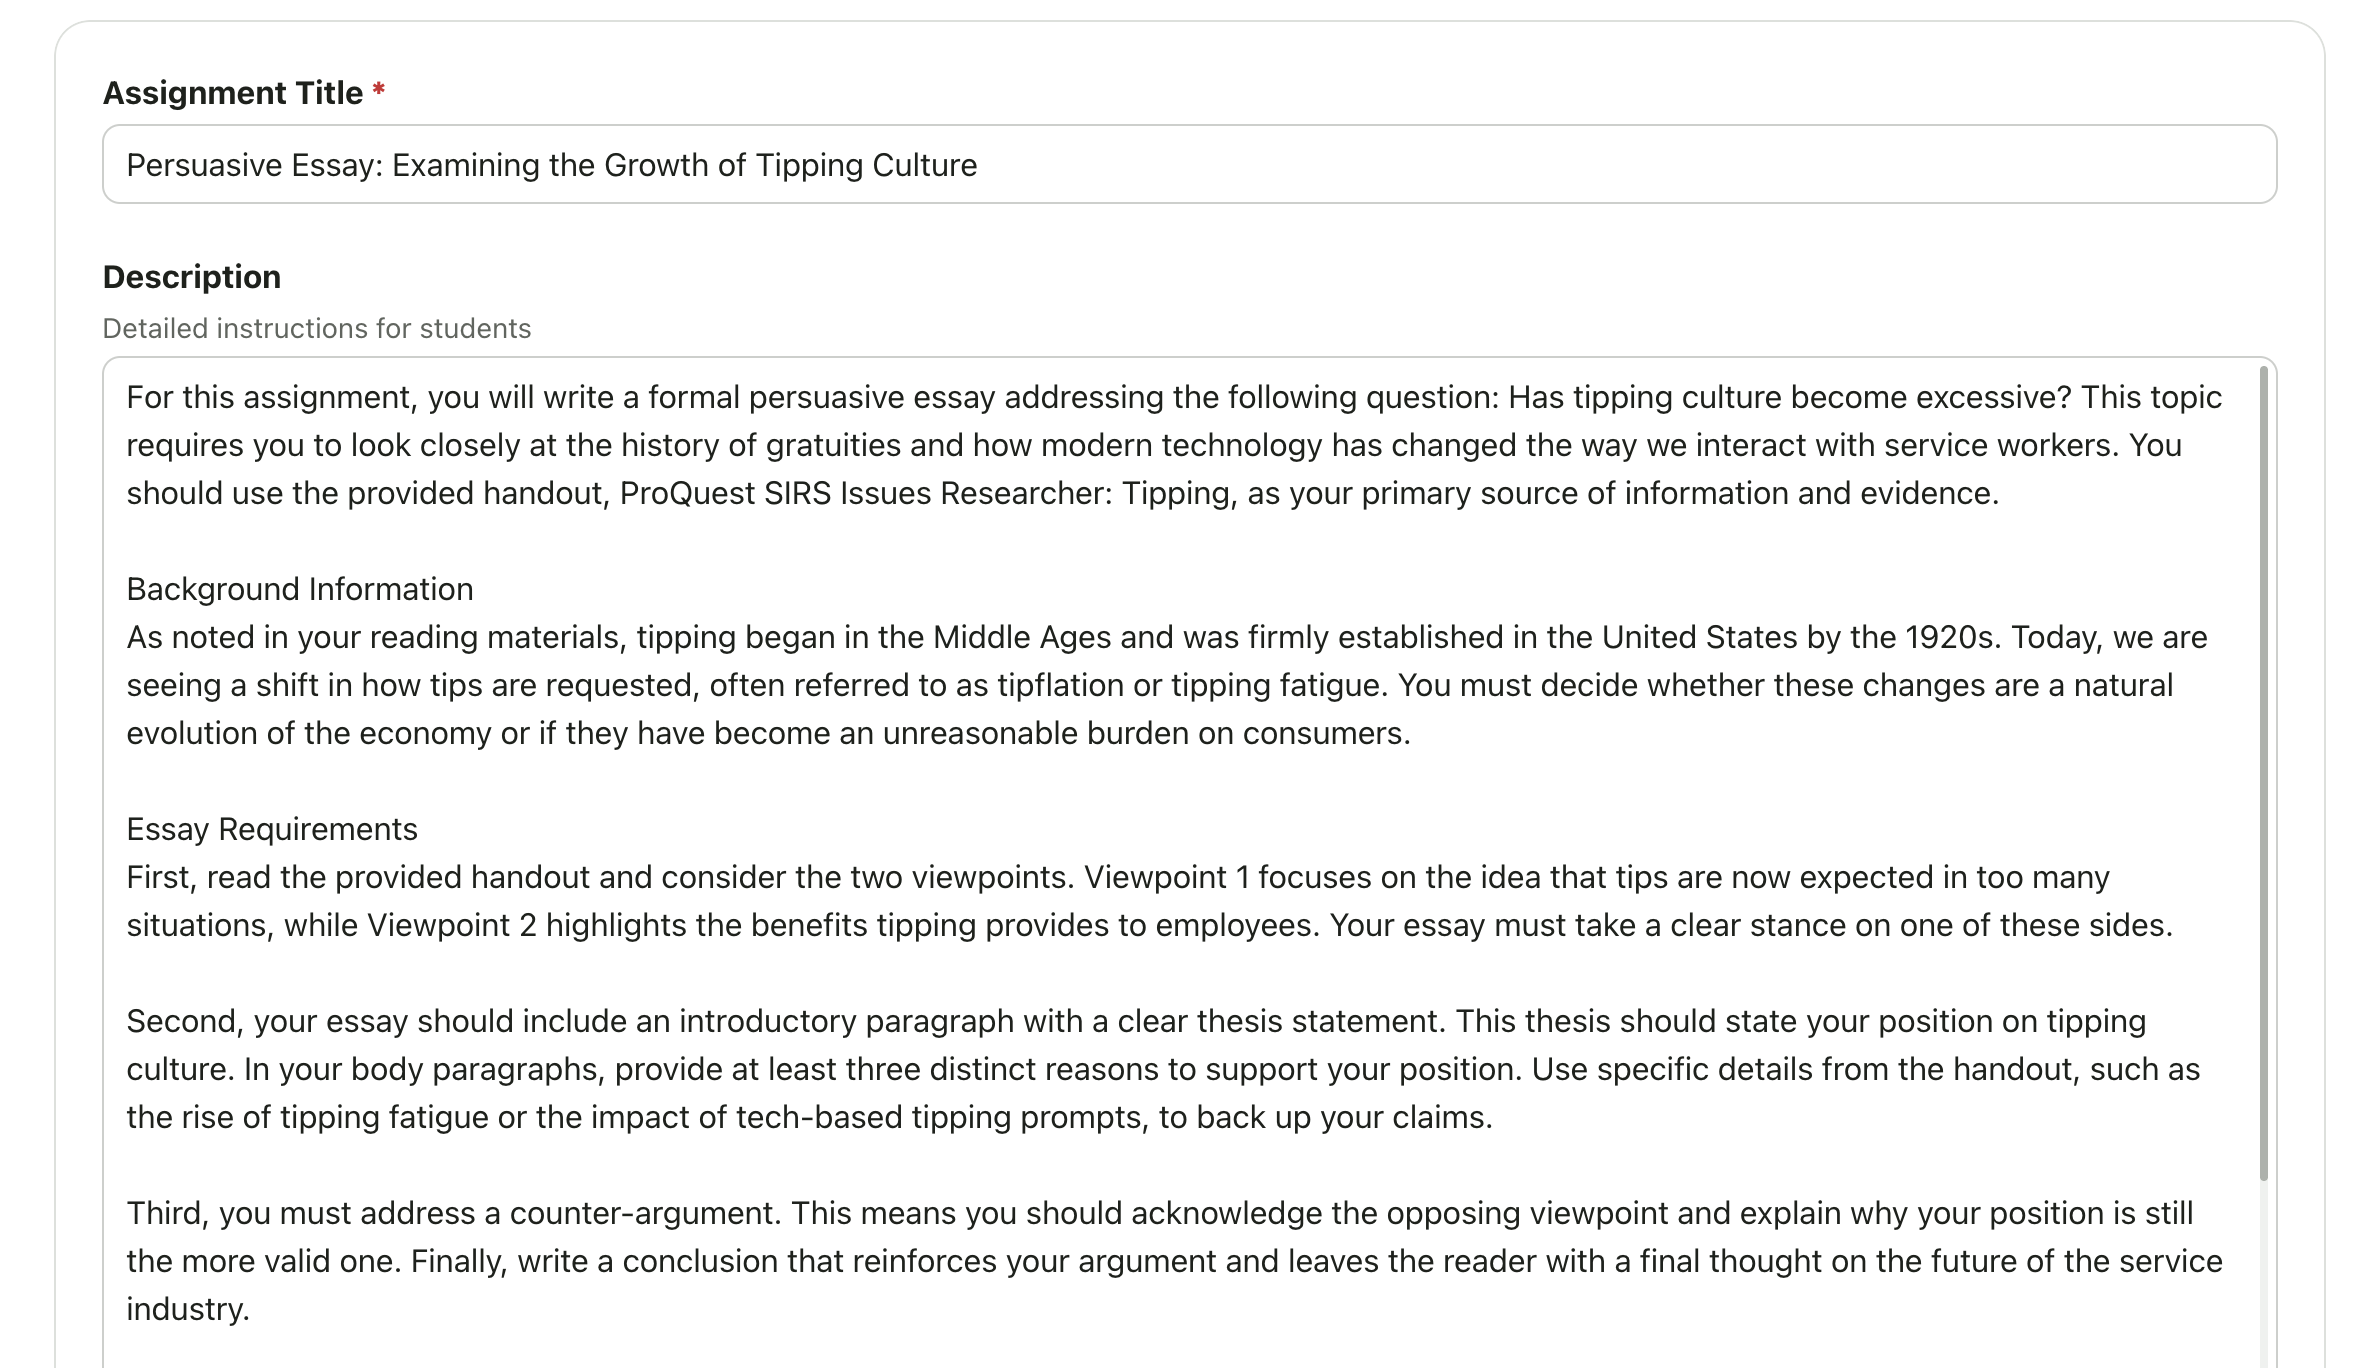
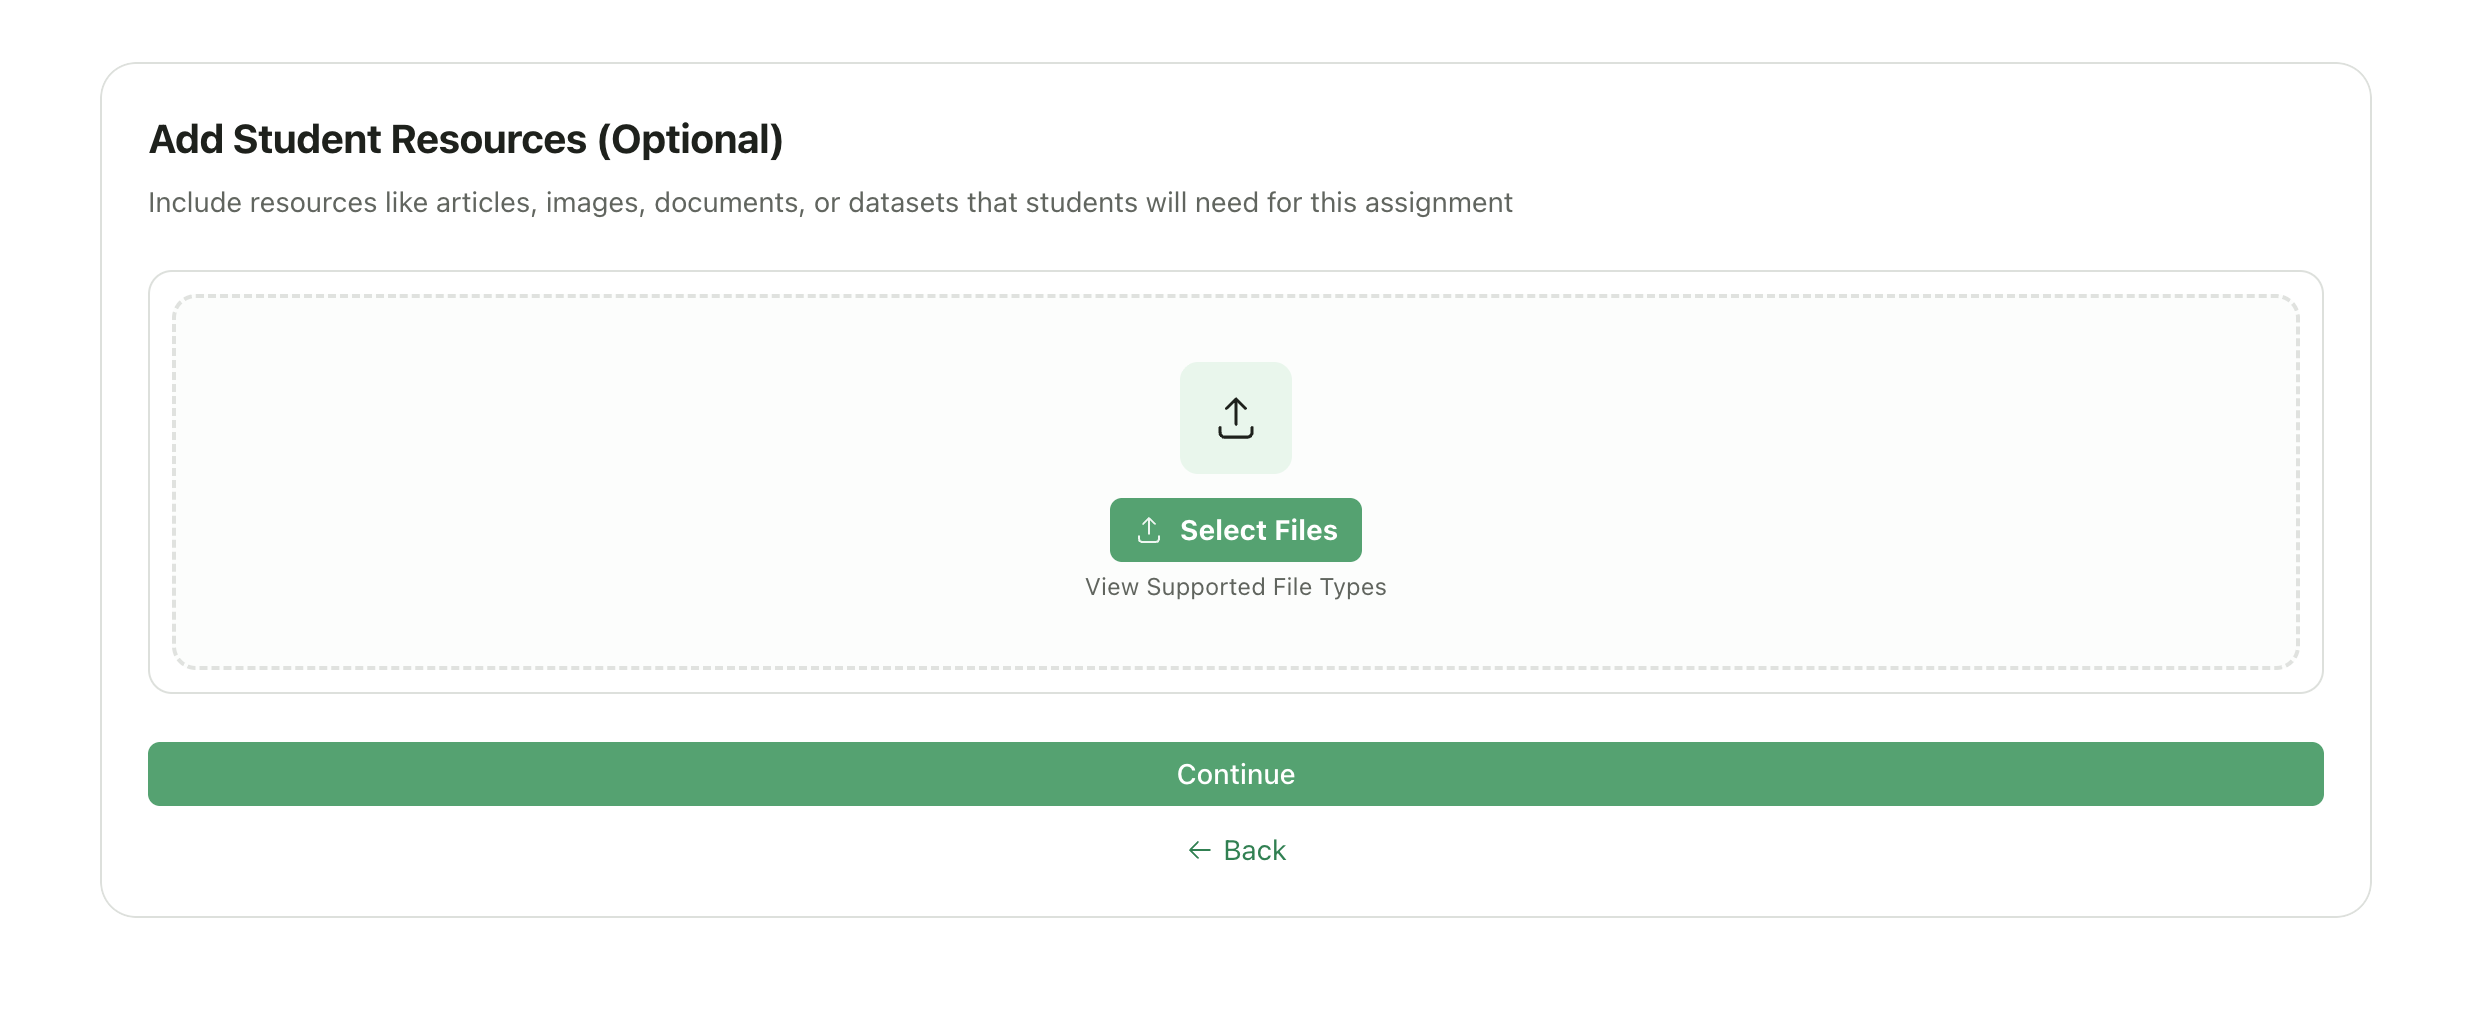
### Add Materials (Optional)
Upload handouts, rubrics, or reference materials that students received with the assignment. These help the AI understand context and expectations.
1. Click **Add Materials**
2. Upload files from your device or Google Drive
3. Supported formats: PDF, Word, images, Google Docs
#### Option C: Import from Google Classroom
For Google Classroom-connected classes, you can import an existing assignment.
1. Select **Import from Google Classroom**
2. Choose an assignment from the list
3. The assignment details, description, and any attached rubric are imported
Learn more about importing from Google Classroom
***
### Add Materials (Optional)
Upload handouts, rubrics, or reference materials that students received with the assignment. These help the AI understand context and expectations.
1. Click **Add Materials**
2. Upload files from your device or Google Drive
3. Supported formats: PDF, Word, images, Google Docs
 **When to add materials:**
* Source readings students should reference
* Assignment handouts with additional instructions
***
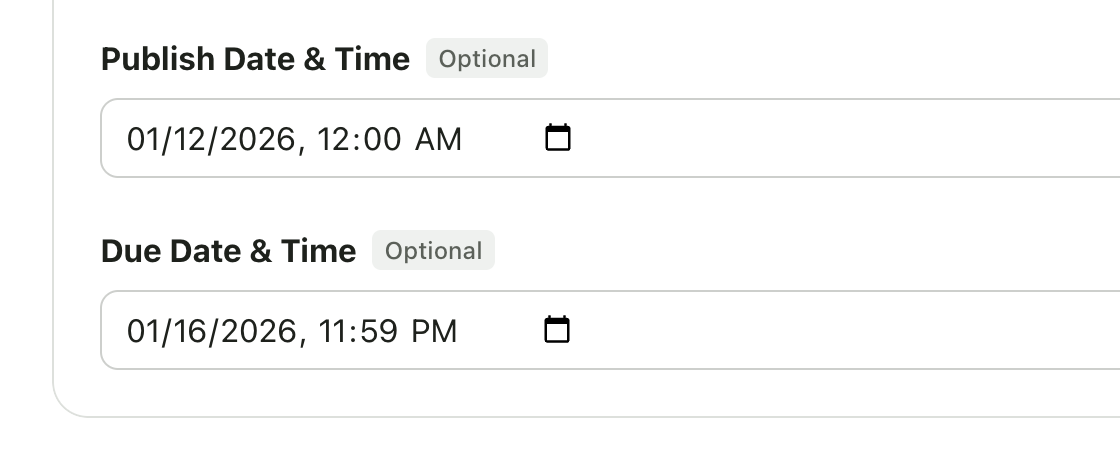
### Set Dates (Optional)
Configure when the assignment is visible and due.
| Field | Description |
| ---------------- | ------------------------------------------------------------------------- |
| **Publish Date** | When students can see the assignment. Leave blank to publish immediately. |
| **Due Date** | Submission deadline. Students can still submit after this date. |
**When to add materials:**
* Source readings students should reference
* Assignment handouts with additional instructions
***
### Set Dates (Optional)
Configure when the assignment is visible and due.
| Field | Description |
| ---------------- | ------------------------------------------------------------------------- |
| **Publish Date** | When students can see the assignment. Leave blank to publish immediately. |
| **Due Date** | Submission deadline. Students can still submit after this date. |
 ***
## Step 2: Create Your Rubric
Define the criteria the AI will use to grade student work.
### Option A: Generate with AI
Let AI create a rubric based on your assignment details.
Click **Generate with AI**
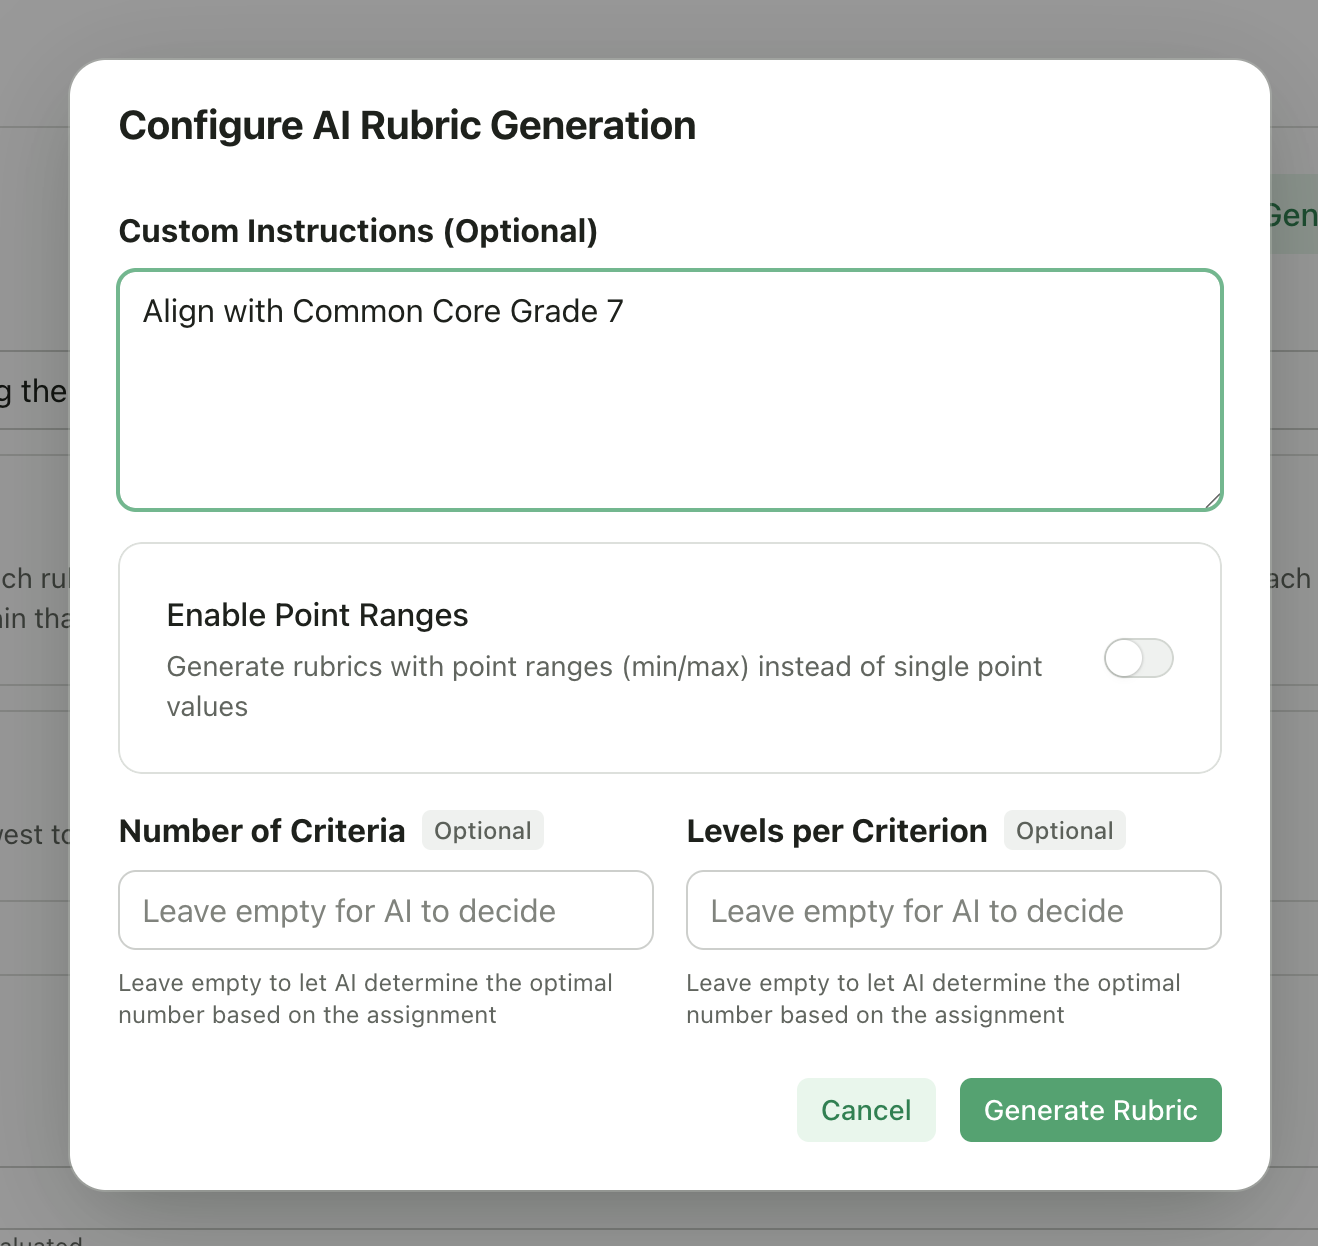
A dialog appears with configuration options:
| Setting | Description |
| ------------------------ | --------------------------------------------------------------------- |
| **Custom Instructions** | Specify standards alignment, specific criteria, or other requirements |
| **Enable Point Ranges** | Use min/max ranges instead of single point values |
| **Number of Criteria** | Specify how many criteria (1-10) or let AI decide |
| **Levels per Criterion** | Specify how many levels (2-8) or let AI decide |
Click **Generate Rubric**
Review the generated rubric and edit as needed
***
## Step 2: Create Your Rubric
Define the criteria the AI will use to grade student work.
### Option A: Generate with AI
Let AI create a rubric based on your assignment details.
Click **Generate with AI**
A dialog appears with configuration options:
| Setting | Description |
| ------------------------ | --------------------------------------------------------------------- |
| **Custom Instructions** | Specify standards alignment, specific criteria, or other requirements |
| **Enable Point Ranges** | Use min/max ranges instead of single point values |
| **Number of Criteria** | Specify how many criteria (1-10) or let AI decide |
| **Levels per Criterion** | Specify how many levels (2-8) or let AI decide |
Click **Generate Rubric**
Review the generated rubric and edit as needed
 ### Option B: Import from Existing Rubric
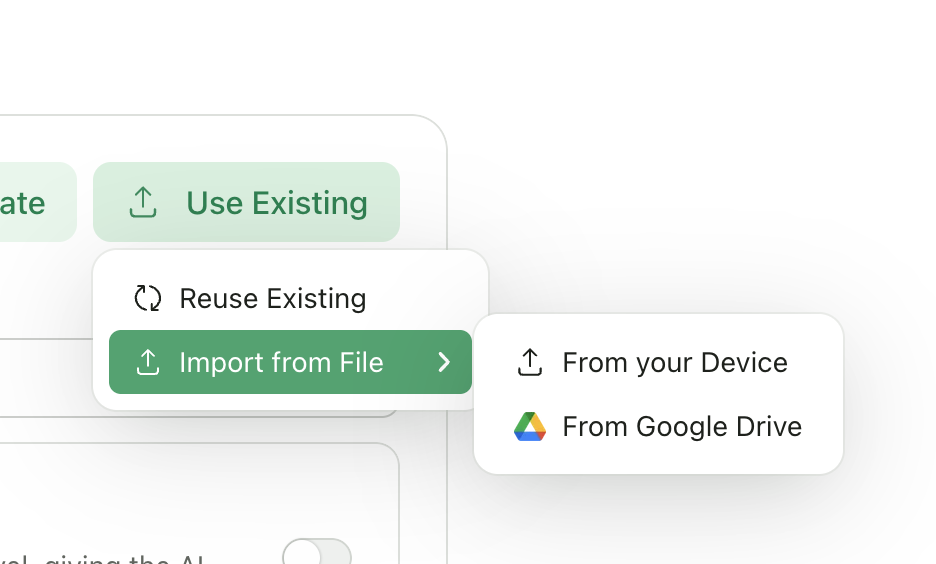
Reuse a rubric from a previous assignment.
1. Click **Import from Existing**
2. Browse your saved rubrics
3. Select one to copy to this assignment
4. Edit as needed
### Option B: Import from Existing Rubric
Reuse a rubric from a previous assignment.
1. Click **Import from Existing**
2. Browse your saved rubrics
3. Select one to copy to this assignment
4. Edit as needed
 ### Option C: Create Manually
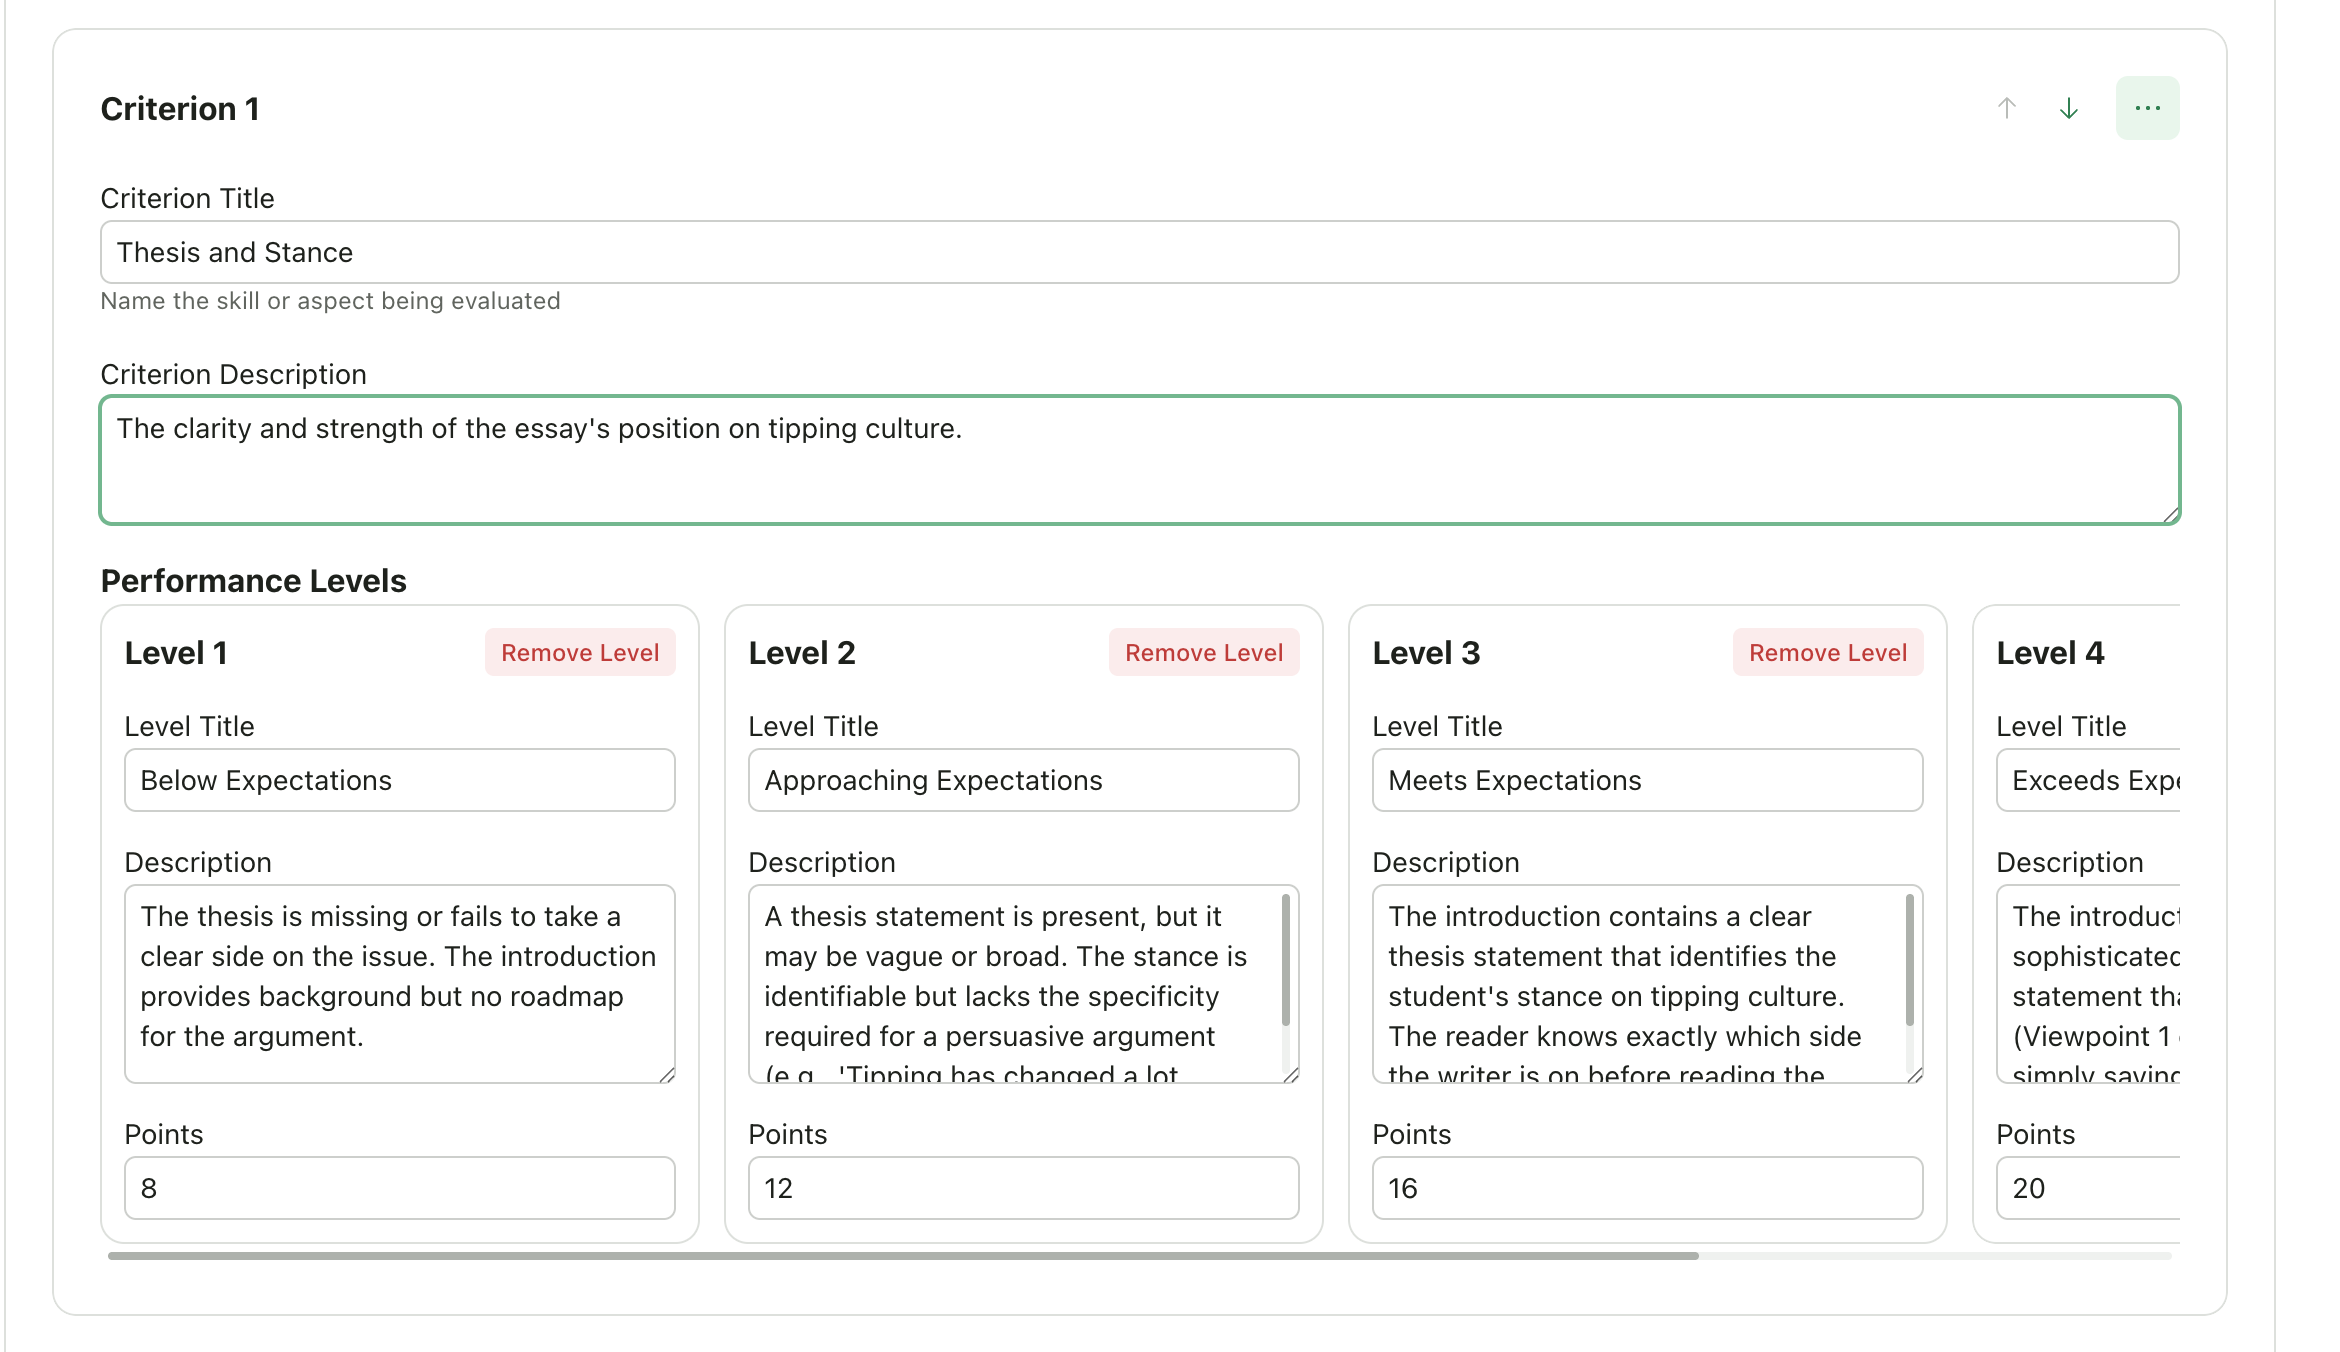
Build your rubric from scratch.
Click **Add Criterion**
Enter:
* **Criterion name** (e.g., "Thesis Statement")
* **Description** (what this criterion evaluates)
Add levels for this criterion:
* **Level name** (e.g., "Excellent", "Proficient", "Developing")
* **Points** (single value or min/max range)
* **Description** (what this level looks like)
Repeat for additional criteria
### Option C: Create Manually
Build your rubric from scratch.
Click **Add Criterion**
Enter:
* **Criterion name** (e.g., "Thesis Statement")
* **Description** (what this criterion evaluates)
Add levels for this criterion:
* **Level name** (e.g., "Excellent", "Proficient", "Developing")
* **Points** (single value or min/max range)
* **Description** (what this level looks like)
Repeat for additional criteria
 ***
### Editing Your Rubric
Once you have a rubric (generated, imported, or manual), you can edit it:
| Action | How |
| ------------------------- | ----------------------------------------------------------------- |
| **Edit text** | Click on any criterion name, level, or description to edit inline |
| **Change points** | Click on point values to modify |
| **Reorder criteria** | Use the up/down arrows on each criterion |
| **Duplicate a criterion** | Click the menu (three dots) → **Duplicate** |
| **Delete a criterion** | Click the menu (three dots) → **Delete** |
| **Edit with AI** | Click the menu (three dots) → **Edit with AI** |
| **Add a level** | Click **Add Level** within a criterion |
| **Remove a level** | Click the trash icon on the level |
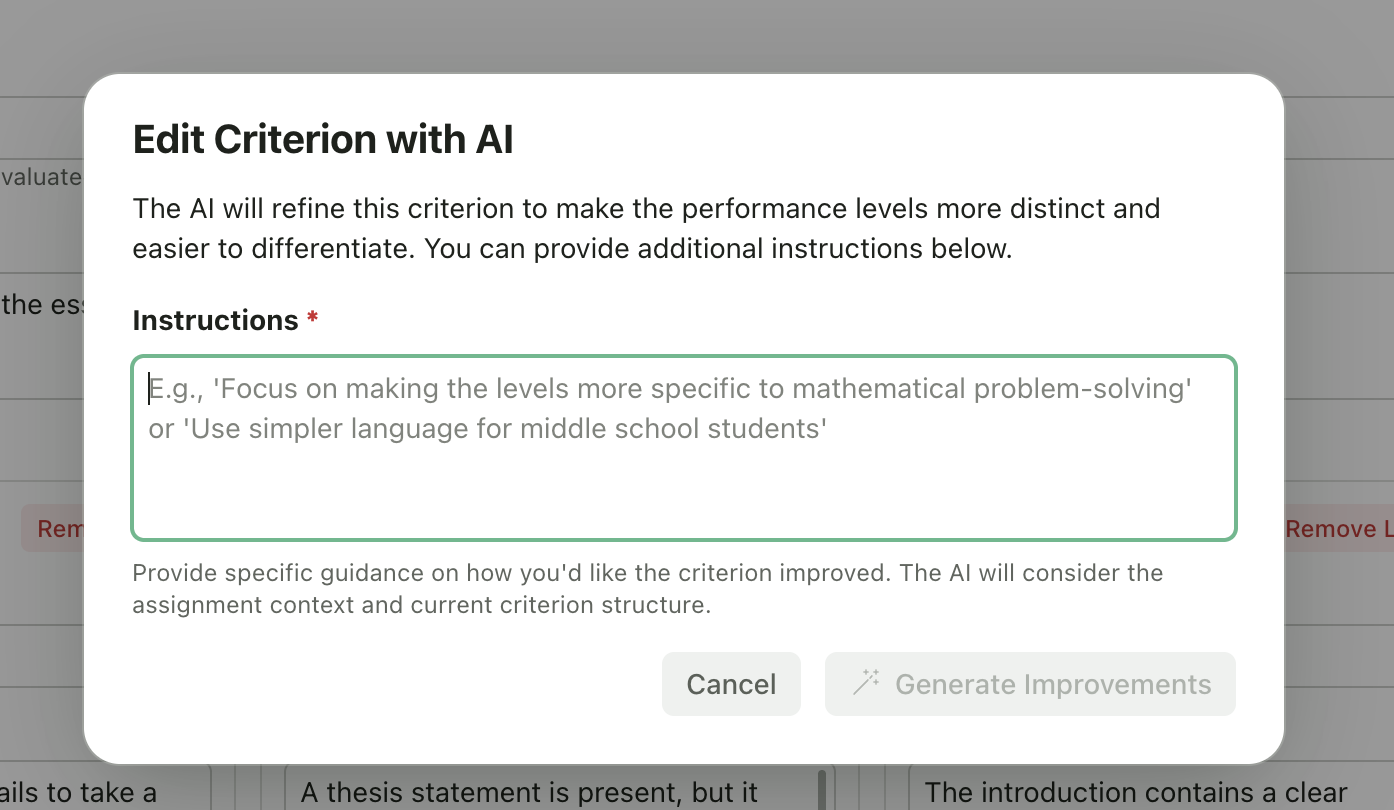
### Edit with AI
Use AI to refine individual criteria and make performance levels more distinct and easier to differentiate.
1. Click the menu (three dots) on any criterion
2. Select **Edit with AI**
3. In the dialog, provide instructions for how you'd like the criterion improved:
* "Focus on making the levels more specific to mathematical problem-solving"
* "Use simpler language for middle school students"
* "Add more detail to distinguish between the middle performance levels"
4. Click **Generate Improvements**
5. Review and further edit the AI suggestions as needed
The AI considers your assignment context and the current criterion structure when generating improvements.
***
### Editing Your Rubric
Once you have a rubric (generated, imported, or manual), you can edit it:
| Action | How |
| ------------------------- | ----------------------------------------------------------------- |
| **Edit text** | Click on any criterion name, level, or description to edit inline |
| **Change points** | Click on point values to modify |
| **Reorder criteria** | Use the up/down arrows on each criterion |
| **Duplicate a criterion** | Click the menu (three dots) → **Duplicate** |
| **Delete a criterion** | Click the menu (three dots) → **Delete** |
| **Edit with AI** | Click the menu (three dots) → **Edit with AI** |
| **Add a level** | Click **Add Level** within a criterion |
| **Remove a level** | Click the trash icon on the level |
### Edit with AI
Use AI to refine individual criteria and make performance levels more distinct and easier to differentiate.
1. Click the menu (three dots) on any criterion
2. Select **Edit with AI**
3. In the dialog, provide instructions for how you'd like the criterion improved:
* "Focus on making the levels more specific to mathematical problem-solving"
* "Use simpler language for middle school students"
* "Add more detail to distinguish between the middle performance levels"
4. Click **Generate Improvements**
5. Review and further edit the AI suggestions as needed
The AI considers your assignment context and the current criterion structure when generating improvements.
 ***
## Step 3: Feedback Settings
Configure how the AI generates feedback for students.
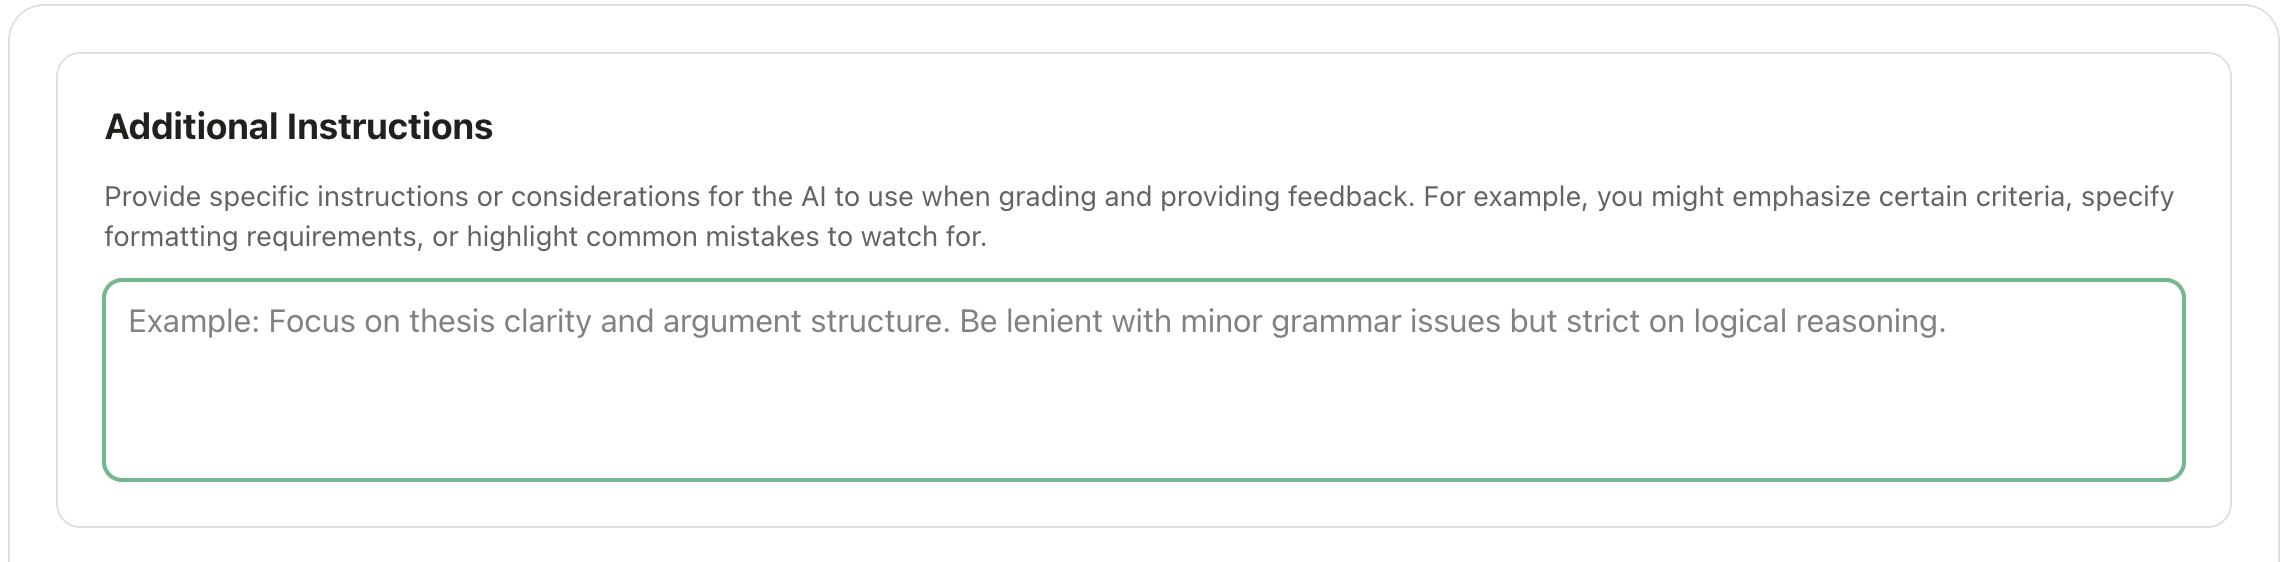
### Additional Grading Instructions
Provide context to the AI that will be used during both grading and feedback generation. These instructions are **not visible to students**.
Use this to share information that isn't captured in your rubric:
* Special considerations for this assignment
* Things to look for or ignore
* Context about what was taught in class
* Common mistakes to flag
* Specific terminology or concepts students should use
***
## Step 3: Feedback Settings
Configure how the AI generates feedback for students.
### Additional Grading Instructions
Provide context to the AI that will be used during both grading and feedback generation. These instructions are **not visible to students**.
Use this to share information that isn't captured in your rubric:
* Special considerations for this assignment
* Things to look for or ignore
* Context about what was taught in class
* Common mistakes to flag
* Specific terminology or concepts students should use
 ### Feedback Style
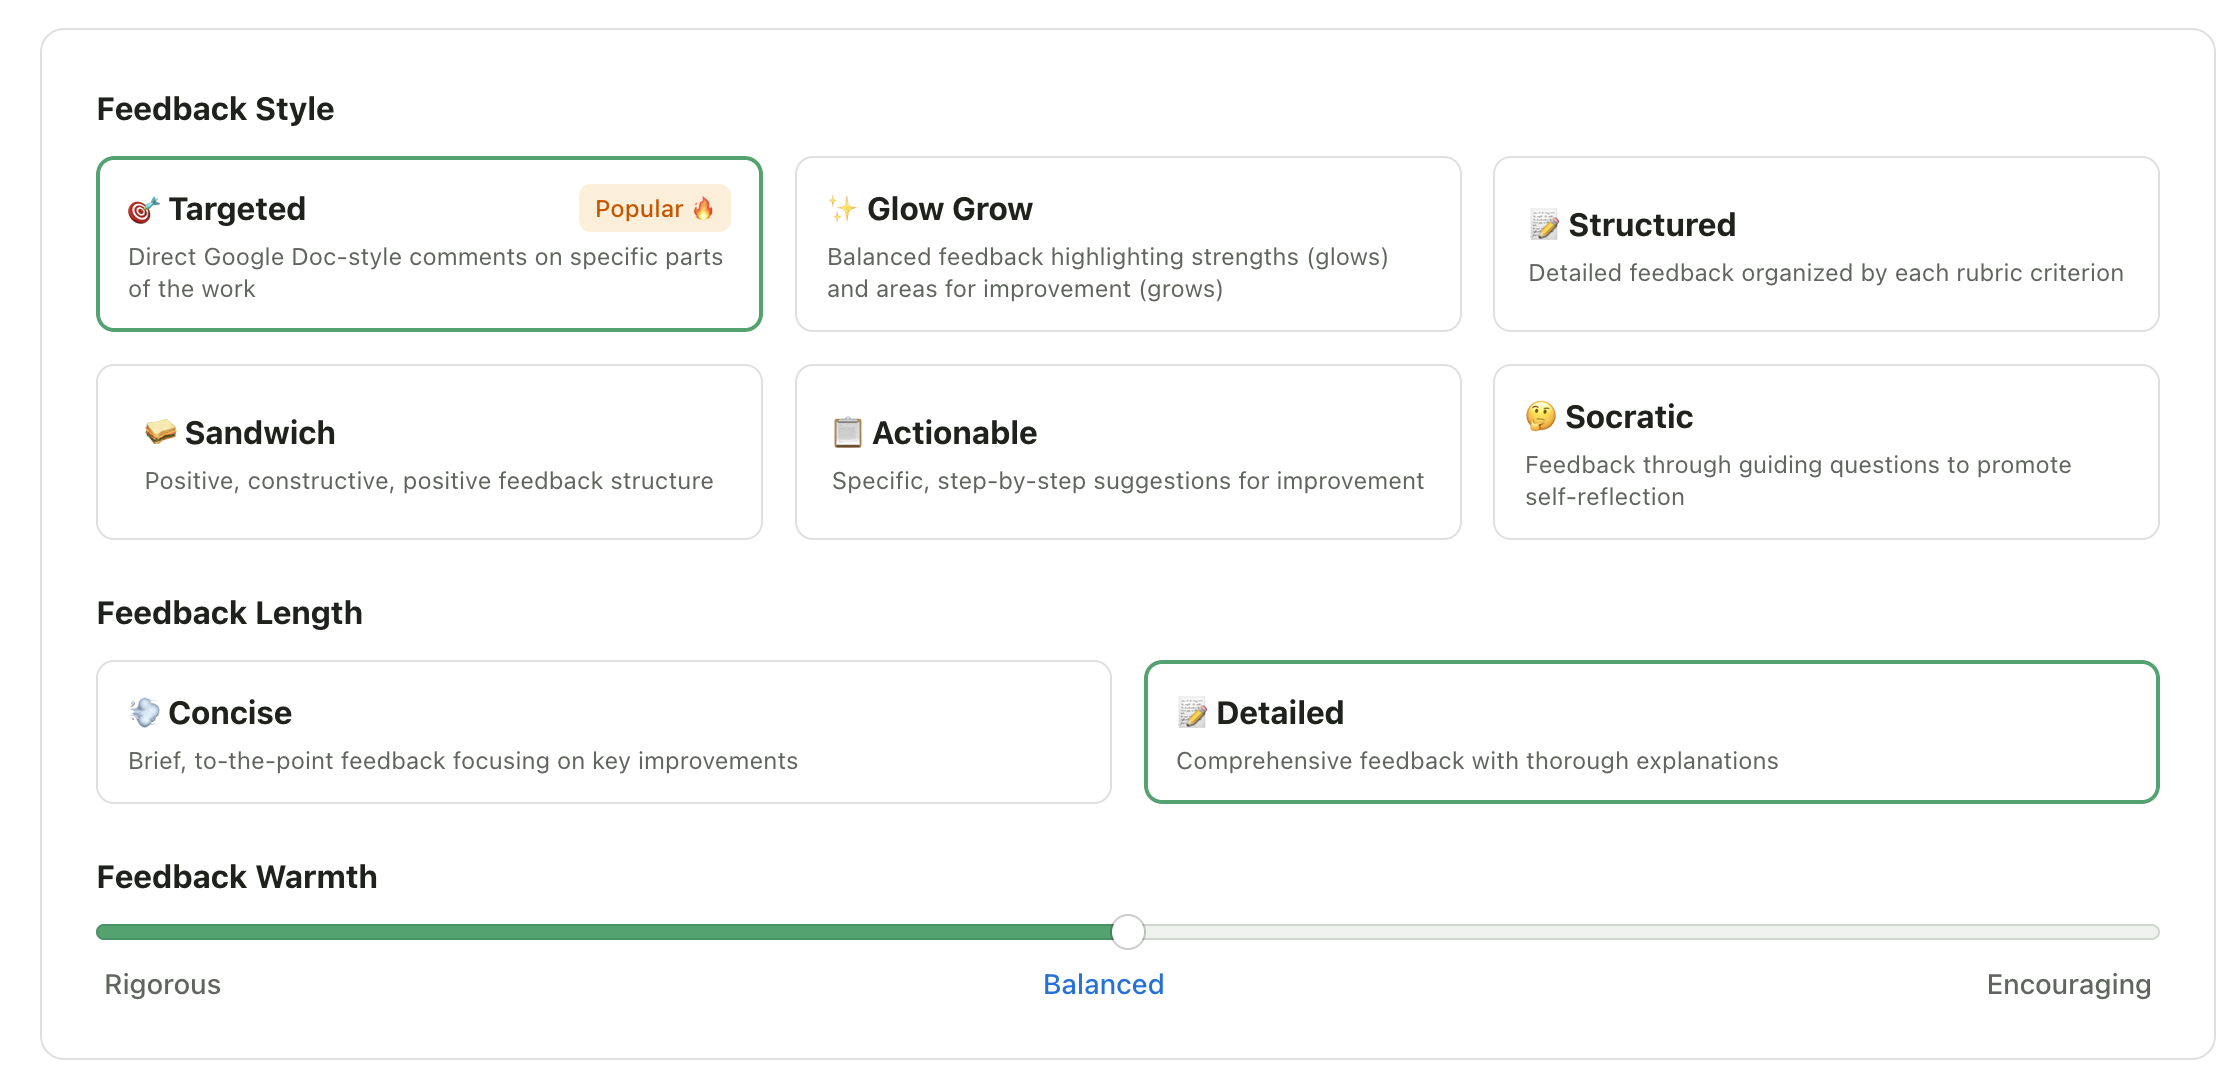
| Style | Description | Best For |
| ----------------- | ------------------------------------------------------------------ | ------------------------------------------------------- |
| 🎯 **Targeted** | Google Docs-style inline comments on specific parts of the work | Writing assignments with typed/digital text submissions |
| ✨ **Glow & Grow** | Highlights strengths ("glows") and areas for improvement ("grows") | Younger students, encouraging tone |
| 📝 **Structured** | Detailed feedback organized by each rubric criterion | When you want feedback mapped directly to your rubric |
| 🥪 **Sandwich** | Positive, constructive, positive feedback structure | Balanced approach that maintains student motivation |
| 📋 **Actionable** | Specific, step-by-step suggestions for improvement | When students need clear next steps |
| 🤔 **Socratic** | Feedback through guiding questions to promote self-reflection | Encouraging deeper thinking and self-assessment |
**About Targeted Feedback:**
Targeted feedback places comments directly on specific text passages, similar to commenting in Google Docs. This style is only available for **Writing & Essays** assignments.
**Not recommended for handwritten submissions:** Targeted feedback works best with typed/digital text. For scanned handwritten work, the AI cannot highlight text directly on the submission. Consider using **Structured** or **Glow & Grow** instead for handwritten submissions.
Presentations and Art & Design assignments default to Glow & Grow since targeted inline comments are not applicable to visual work.
### Feedback Length
| Length | Description |
| ------------ | --------------------------------------------------------- |
| **Concise** | Brief, to-the-point feedback focusing on key improvements |
| **Detailed** | Comprehensive feedback with thorough explanations |
### Feedback Warmth
Controls the tone of the AI-generated feedback, displayed as a slider with three positions:
| Setting | Description |
| --------------- | --------------------------------------------------------------- |
| **Rigorous** | Direct, critical feedback that holds students to high standards |
| **Balanced** | Mix of praise and constructive criticism (default) |
| **Encouraging** | Warm, supportive tone that emphasizes positives |
### Feedback Style
| Style | Description | Best For |
| ----------------- | ------------------------------------------------------------------ | ------------------------------------------------------- |
| 🎯 **Targeted** | Google Docs-style inline comments on specific parts of the work | Writing assignments with typed/digital text submissions |
| ✨ **Glow & Grow** | Highlights strengths ("glows") and areas for improvement ("grows") | Younger students, encouraging tone |
| 📝 **Structured** | Detailed feedback organized by each rubric criterion | When you want feedback mapped directly to your rubric |
| 🥪 **Sandwich** | Positive, constructive, positive feedback structure | Balanced approach that maintains student motivation |
| 📋 **Actionable** | Specific, step-by-step suggestions for improvement | When students need clear next steps |
| 🤔 **Socratic** | Feedback through guiding questions to promote self-reflection | Encouraging deeper thinking and self-assessment |
**About Targeted Feedback:**
Targeted feedback places comments directly on specific text passages, similar to commenting in Google Docs. This style is only available for **Writing & Essays** assignments.
**Not recommended for handwritten submissions:** Targeted feedback works best with typed/digital text. For scanned handwritten work, the AI cannot highlight text directly on the submission. Consider using **Structured** or **Glow & Grow** instead for handwritten submissions.
Presentations and Art & Design assignments default to Glow & Grow since targeted inline comments are not applicable to visual work.
### Feedback Length
| Length | Description |
| ------------ | --------------------------------------------------------- |
| **Concise** | Brief, to-the-point feedback focusing on key improvements |
| **Detailed** | Comprehensive feedback with thorough explanations |
### Feedback Warmth
Controls the tone of the AI-generated feedback, displayed as a slider with three positions:
| Setting | Description |
| --------------- | --------------------------------------------------------------- |
| **Rigorous** | Direct, critical feedback that holds students to high standards |
| **Balanced** | Mix of praise and constructive criticism (default) |
| **Encouraging** | Warm, supportive tone that emphasizes positives |
 ***
## Step 4: Upload Submissions
The final step lets you upload student work or finish setup to upload later.
**Upload now:** See [Upload Student Work](/teacher/grade-your-assignment/upload-student-work)
**Finish setup:** Click **Finish Setup** to save your assignment. You can upload submissions anytime from the assignment page.
***
## Tips for Better Grading Results
The more context you provide, the better the AI understands your expectations.
Vague criteria like "Good writing" lead to inconsistent results; specific criteria like "Uses evidence from the text to support claims" work better.
Source readings and other additional materials help the AI understand what you're looking for.
Use concise feedback for quick assignments, detailed for major projects.
They're a great starting point, but you know your class best—adjust as needed.
***
## Related Articles
* [Select Assignment Type](/teacher/grade-your-assignment/select-assignment-type)
* [Set Up Structured Assignments](/teacher/grade-your-assignment/setup-structured-assignments)
* [Upload Student Work](/teacher/grade-your-assignment/upload-student-work)
* [Reuse Rubric](/teacher/assignment-management/reuse-rubric)
* [Review AI Scores & Feedback](/teacher/grades-and-feedback/review-ai-scores-feedback)
***
## Step 4: Upload Submissions
The final step lets you upload student work or finish setup to upload later.
**Upload now:** See [Upload Student Work](/teacher/grade-your-assignment/upload-student-work)
**Finish setup:** Click **Finish Setup** to save your assignment. You can upload submissions anytime from the assignment page.
***
## Tips for Better Grading Results
The more context you provide, the better the AI understands your expectations.
Vague criteria like "Good writing" lead to inconsistent results; specific criteria like "Uses evidence from the text to support claims" work better.
Source readings and other additional materials help the AI understand what you're looking for.
Use concise feedback for quick assignments, detailed for major projects.
They're a great starting point, but you know your class best—adjust as needed.
***
## Related Articles
* [Select Assignment Type](/teacher/grade-your-assignment/select-assignment-type)
* [Set Up Structured Assignments](/teacher/grade-your-assignment/setup-structured-assignments)
* [Upload Student Work](/teacher/grade-your-assignment/upload-student-work)
* [Reuse Rubric](/teacher/assignment-management/reuse-rubric)
* [Review AI Scores & Feedback](/teacher/grades-and-feedback/review-ai-scores-feedback)